
Sketch by Bohemian Coding has been gaining popularity steadily since its release and is now on its third iteration. Many very large and well know companies such as facebook, Google, Dropbox and Twitter all have designers which use Sketch now. Sketch is a great graphics app for a number of key reasons. Firstly it is a vector graphics app so all graphics are scalable, and icons and designs stay pin sharp no matter the size.
Sketch makes use of objects, slightly similar to the concept of smart objects in Photoshop but essentially an icon can be made up of multiple fully editable components.
Sketch also has an inspector which makes adjusting layer styles and effects very quick and easy. The speed at which you can change shapes appearances is very impressive.
Sketch is also now very feature rich with the inclusion of features like Symbols, Layer styles, Text Styles, Pages and Artboards, Grids and even bitmap editing.
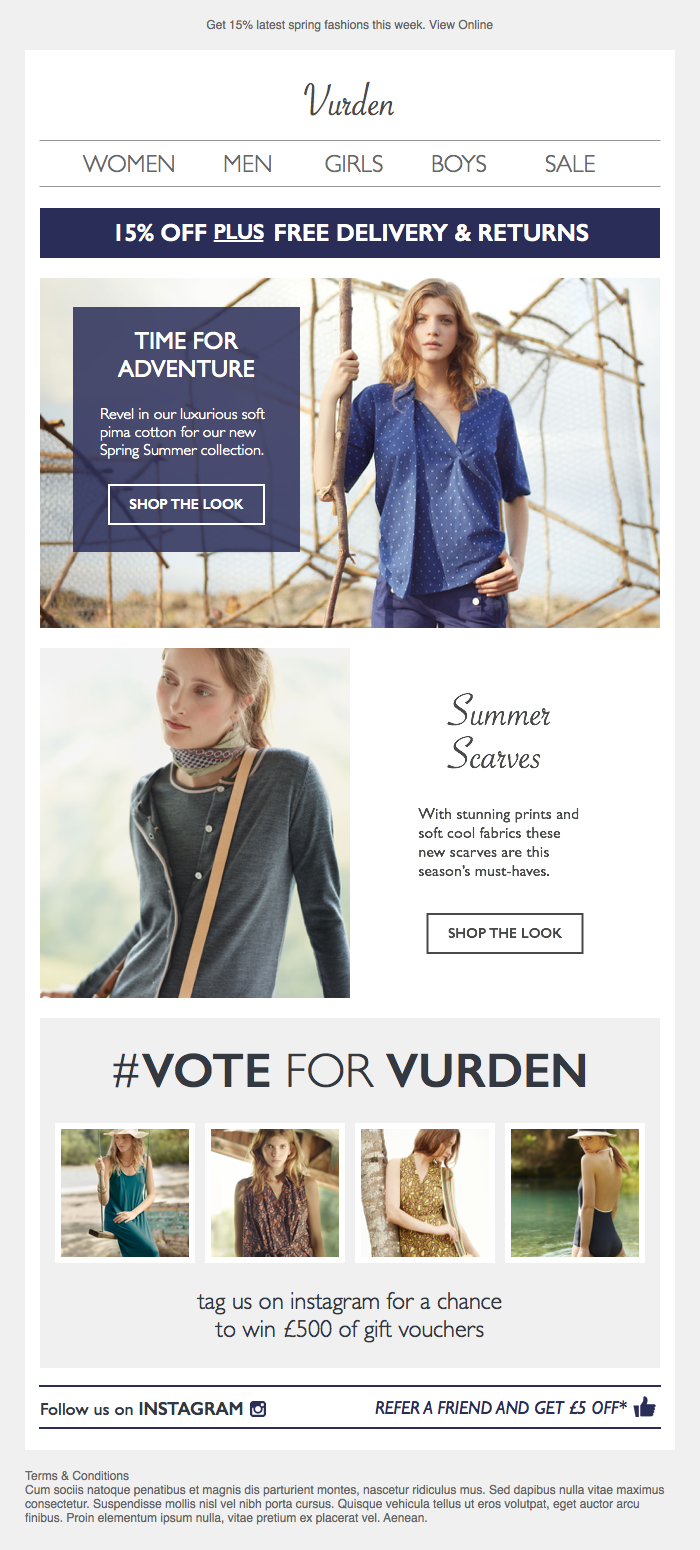
Probably the best way to showcase Sketch for email design is to use it. I have based this design on this excellent Boden email. I thought it had a great design and some concepts and design patterns very common in fashion emails at the moment.
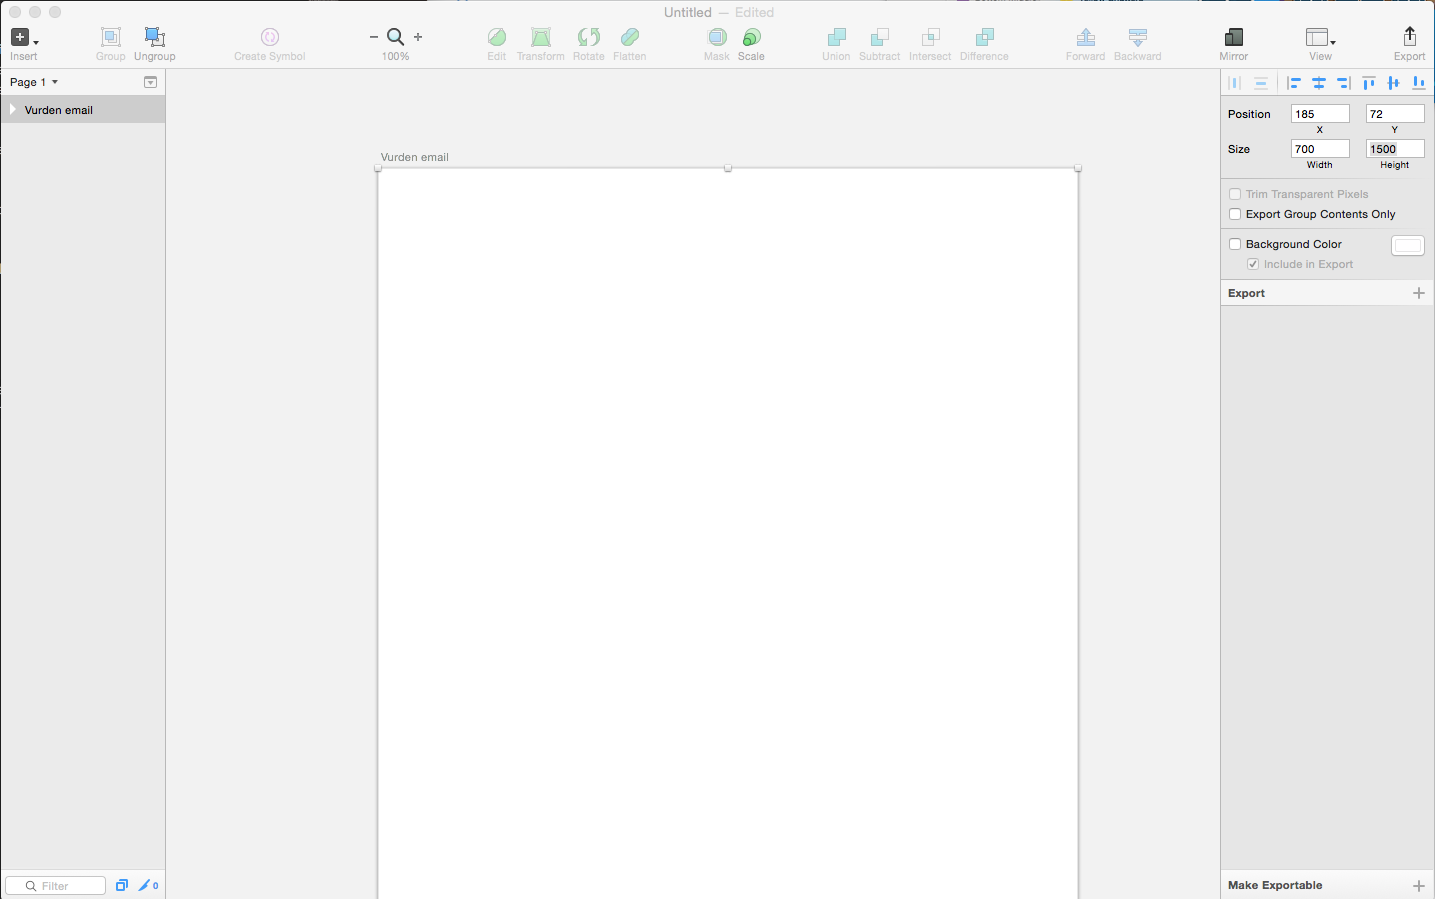
Create the Artboard
Sketch can use multiple artboards in a single file which is one of its most powerful features. A full site design could be all contained in a single file. For our email design we just need a single custom sized art board. Type ‘a’ and draw a rectangle. You can name it Vurden email. Adjust the artboard size to 700 by 1500 in the inspector, measurements are in pixels.
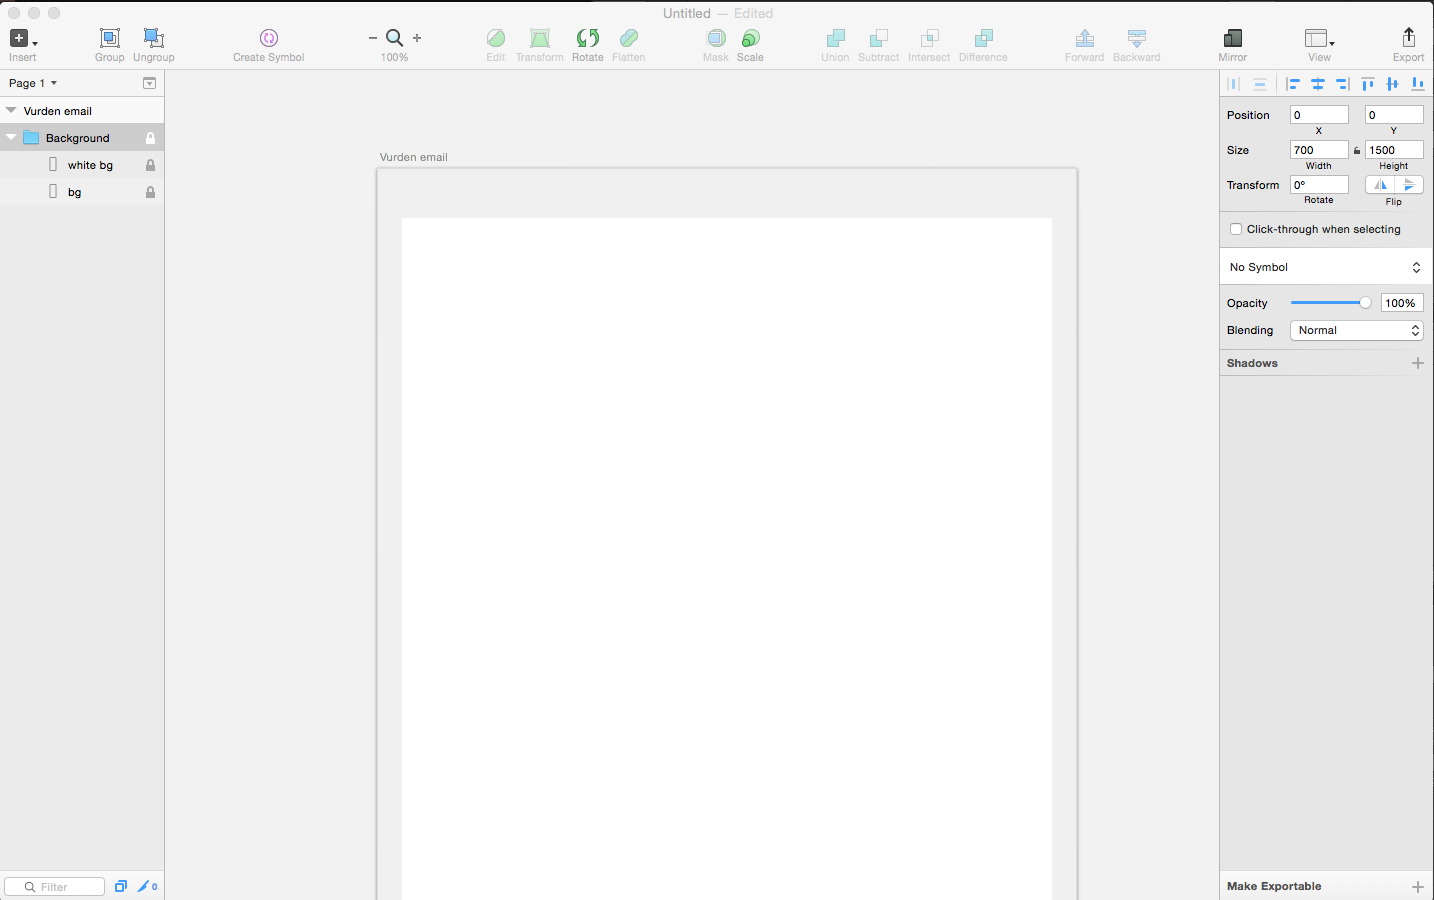
Create a background
Let’s start by adding some background elements for the design. Type ‘r’ and draw a rectangle – set its dimensions to the same size as the artboard and set the fill color to #f0f0f0 and no stroke. Then lock this layer, you can do this in the layer palette or simply right clicking on the shape. Label it bg. Draw another rectangle this time setting its dimensions to 650 by 1400 and fill to #ffffff and no stroke. Set x to 25 and y to 50, label it white bg and then group both cmd + g in a folder and label that Background and lock that. You now have a good starting point to create the email.
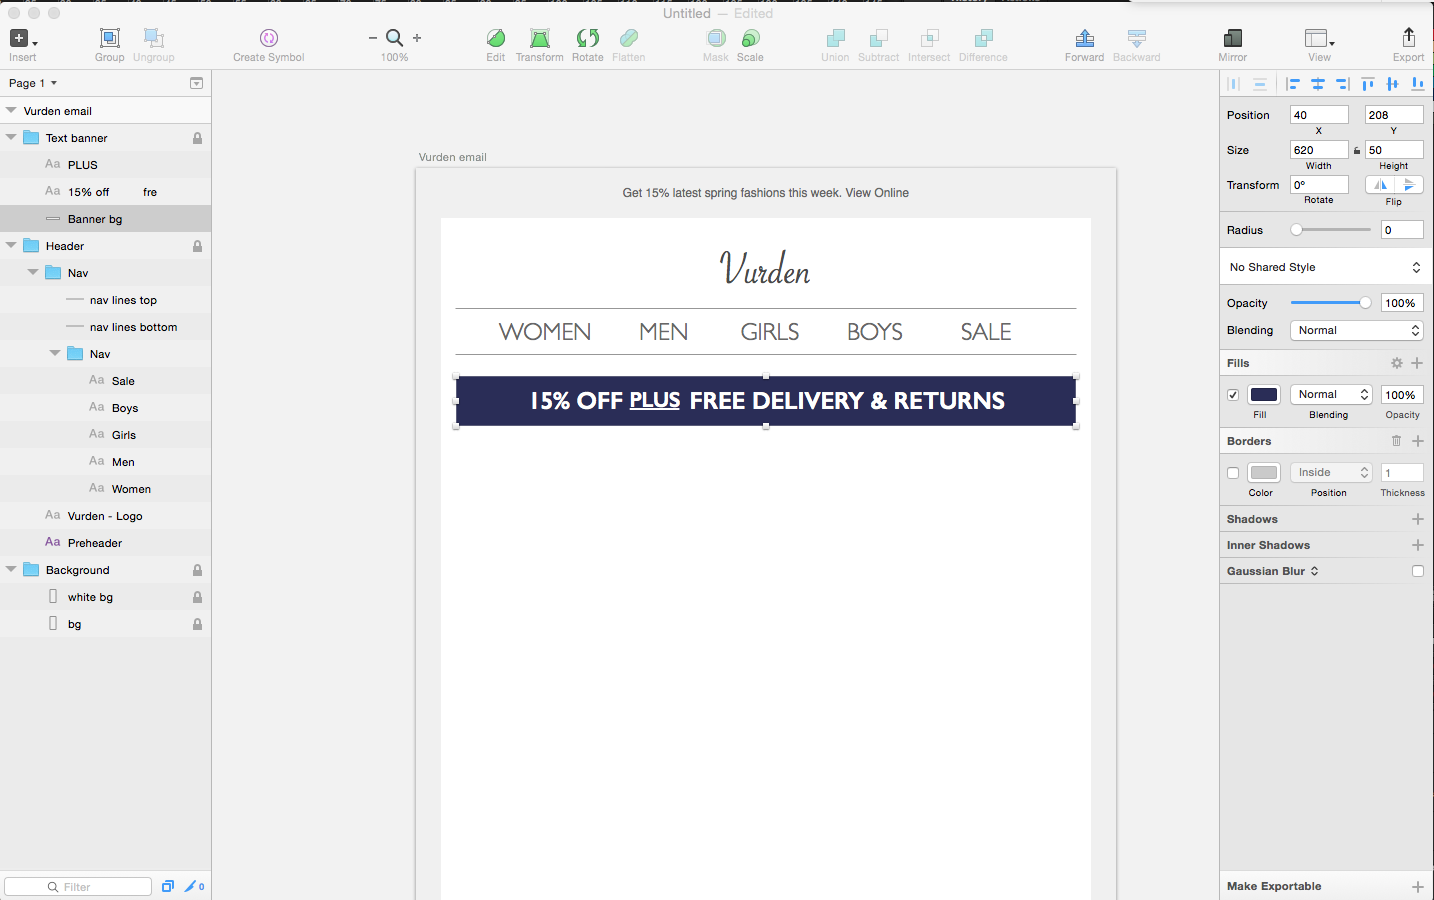
Creating the header
Start by adding the preheader text. Simply type ‘t’ for the type tool and set the color to #676767. Set the type to something san-serif and plain not more than 12px in size and 18 from the top. For the logo place it on the artboard via ‘Insert’ then ‘Image…’ or simply use the type tool. Center align it and give it a y cordinate of 82. Label both layers. Next create a nav folder use the line tool ‘l’ to create 2 lines 620 long, fill of #979797. Then create 5 text items for the nav. I have set them in the center, the same colour as the lines and in a font that matches the brand. Now group all this new content into a folder labelled Header.

A Text banner
Next let’s create a text banner. Start by drawing another rectangle ‘r’ and give it dimensions of 620 by 50. Set the fill to #2A2D57 and center align it with a y coordinate of 208. Label it Banner bg. For the text I used the same font as the nav but at a different weight. In the menu I set the word plus to be Superscript, slightly reduced the font size and underlined it, ‘cmd + u’. The text was then center aligned and the word ‘Plus’ positioned after that. All are placed in a folder labelled Text banner.
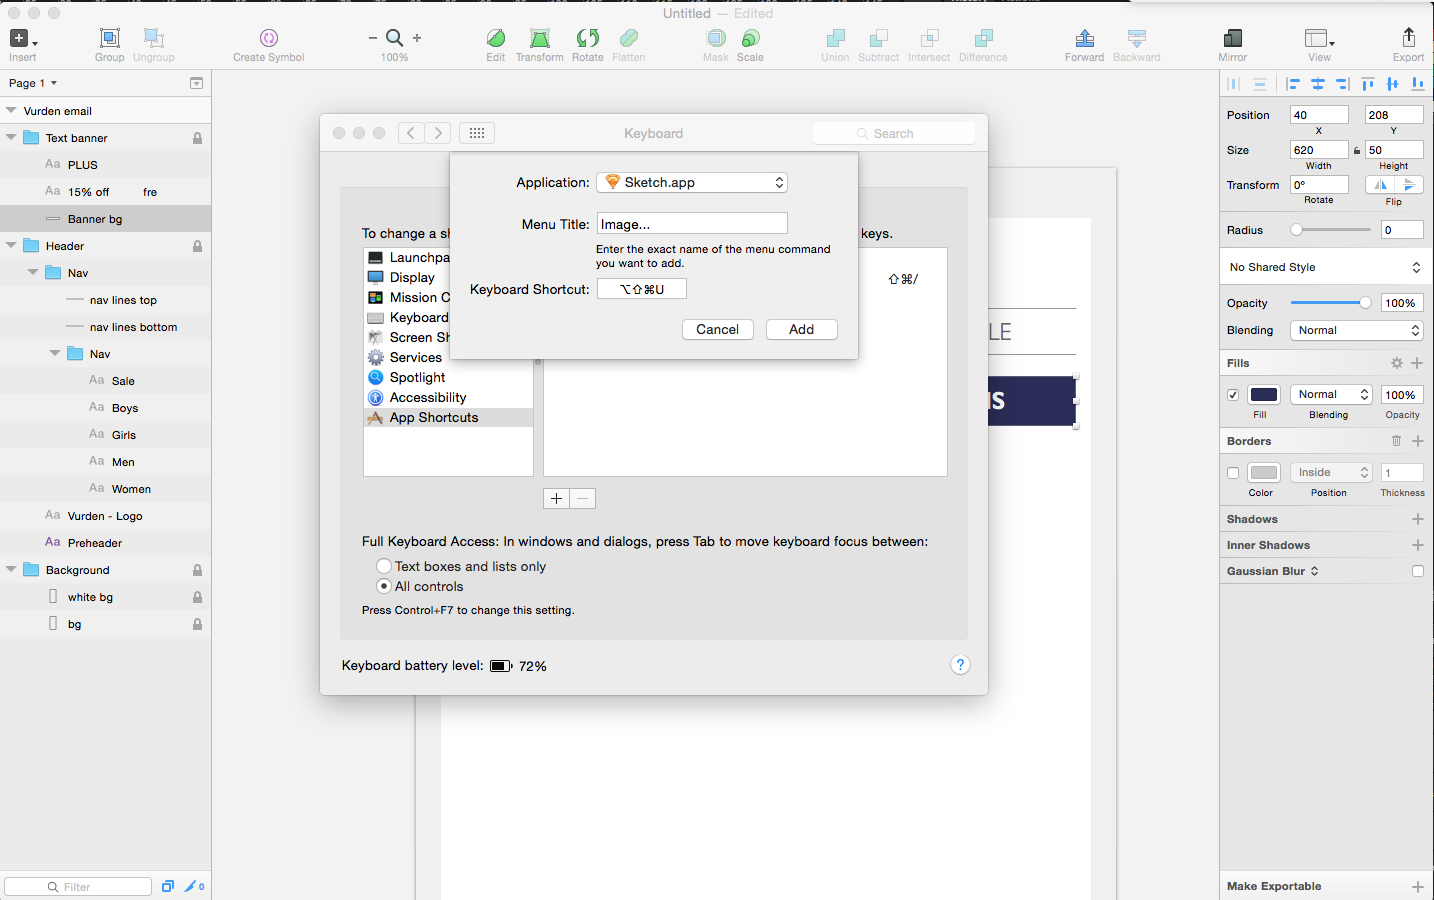
Creating a custom shortcut
As we will be placing many images onto our artboard it would be useful to have a custom shortcut to do so. To create a custom shortcut go to your Sketch, Services, System preferences. Then create a new app shortcut for Sketch. In this case I want insert image to be ‘cmd + shift + p’ – name the shortcut exactly how it appears in the menu and it should work perfectly.
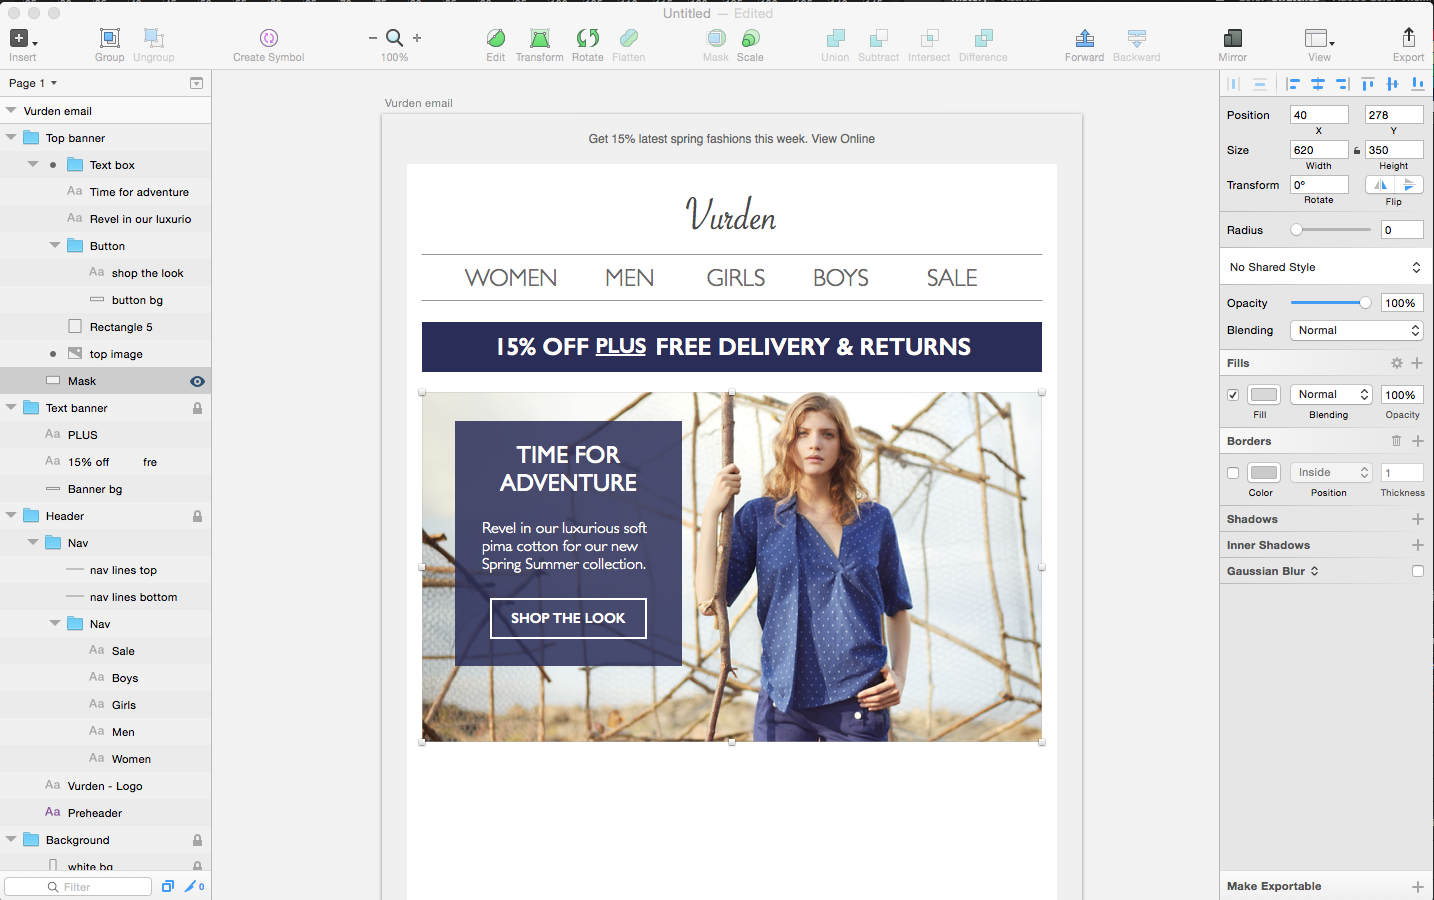
Top banner
First, it is important to create an area to work in so using the rectangle tool ‘r’ draw a shape 620 by 350 and position it 20 below the text banner. This shape will act as a mask for the entire banner. Next, using our new shortcut place the top image onto the art board. Select both the top image and shape and click the mask button at the top of the app. Then simply size and position the image accordingly. Next, create another rectangle shape but give it the same fill as the previous text banner but with an opacity of 85%. Move it into the mask as well. Then group it labelled as text box. The should have a small bullet point next to the name so you can see it sits within the mask. Add some text and create the button simply with a rectangle with no fill and 2px inside stroke. Using the alignment tools to position each item. Group all the contents into a single group labelled Top banner.
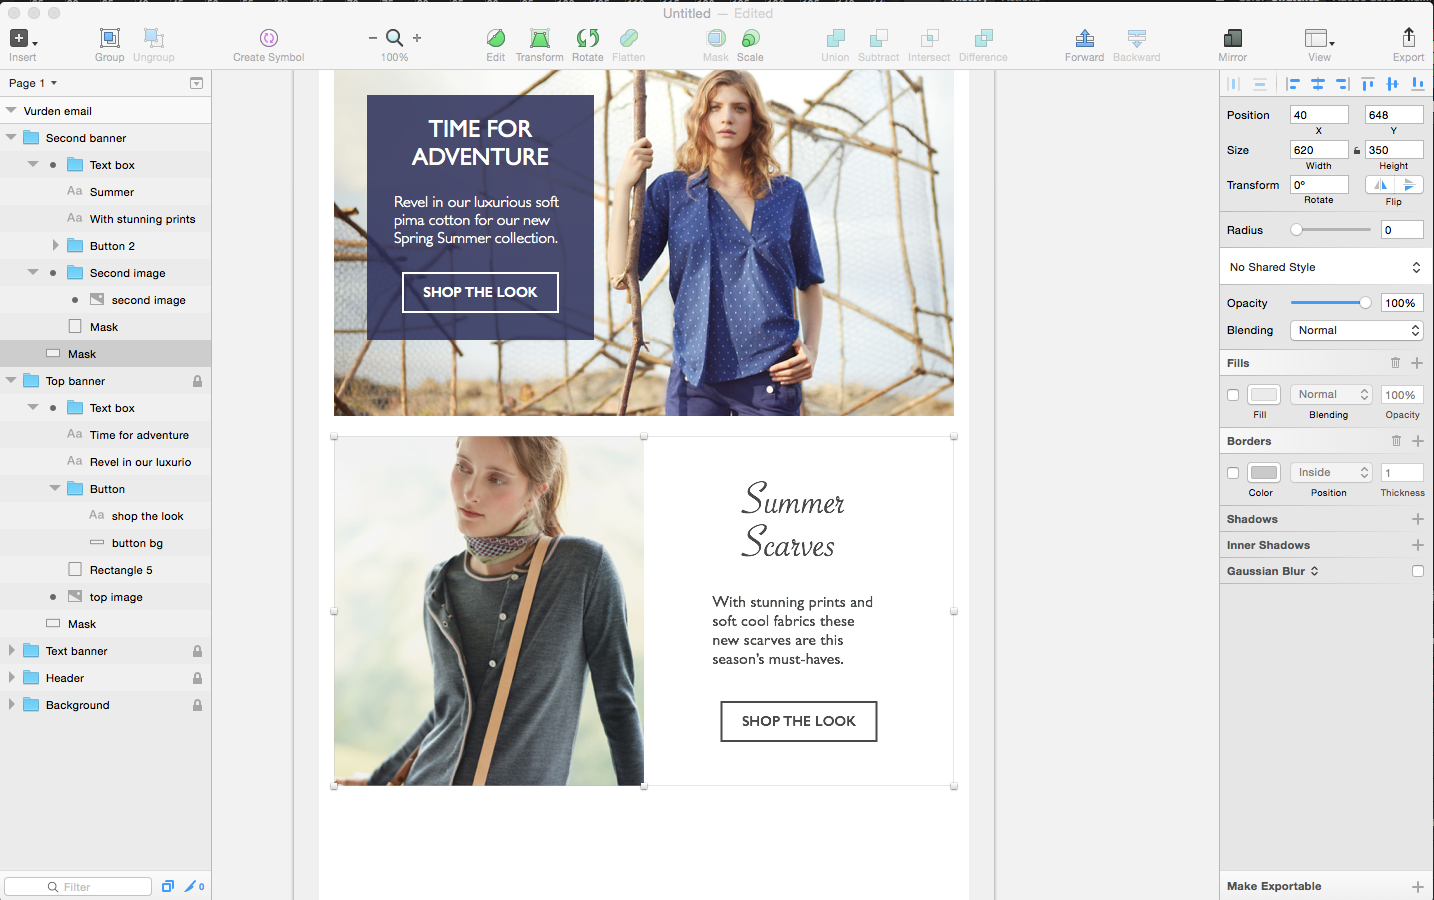
Second banner
For the second banner the setup is very similar to the first banner. A 620 by 350 rectangle is created as a base mask. Then an image is placed into the mask. As this image needs to be only half the width a second mask is used. Create a rectangle 310 by 350 and use this to mask the second image. Using the positioning tools and the original mask position first move the mask to the left edge and exact y position then move the image to the correct position within the mask. For the text on the right right-click on the previous banner’s Text box and click duplicate. Move the next text box folder within the mask of the second banner and position correctly.
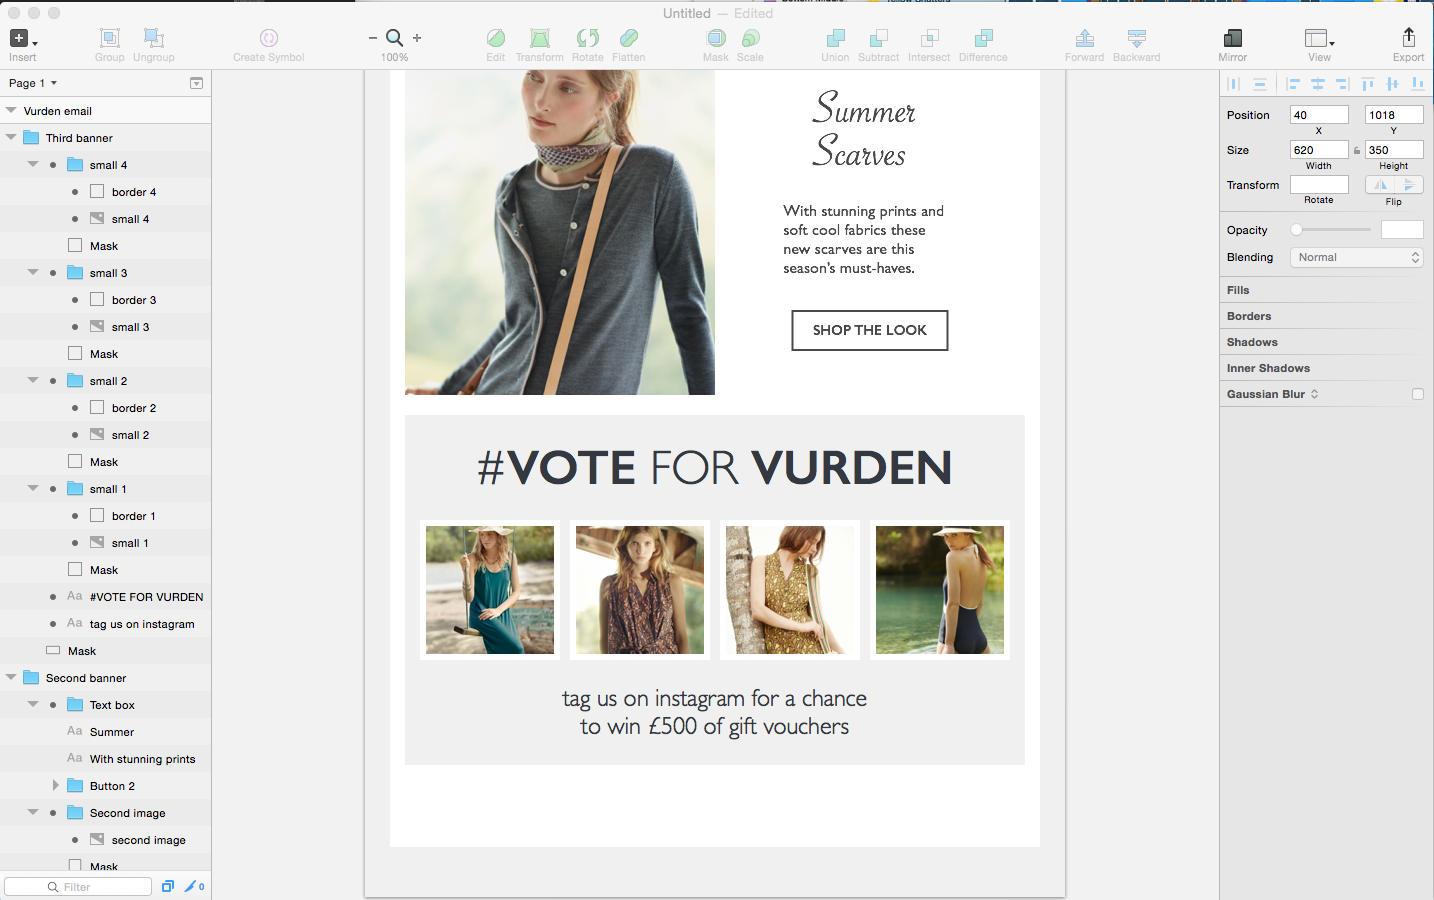
Third banner
This banner starts off the same as the previous two with a 620 by 350 rectangle being used to create a group and mask for the entire banner. Then things get a little different. The base mask is given a fill colour of #f0f0f0 and then two text objects are created. One for the title, two font weights are used. Then another smaller text object is created for the competition details. To create the small photo boxes just create 4 rectangles 146 by 146. Use the alignment tools to equally distribute them and then use them to create masks for the four placed photos. Finally duplicate each mask and move them above the photo. Give each shape no fill and a 6 wide inside border with a #ffffff colour. Lastly group it all together in folder called Third banner.
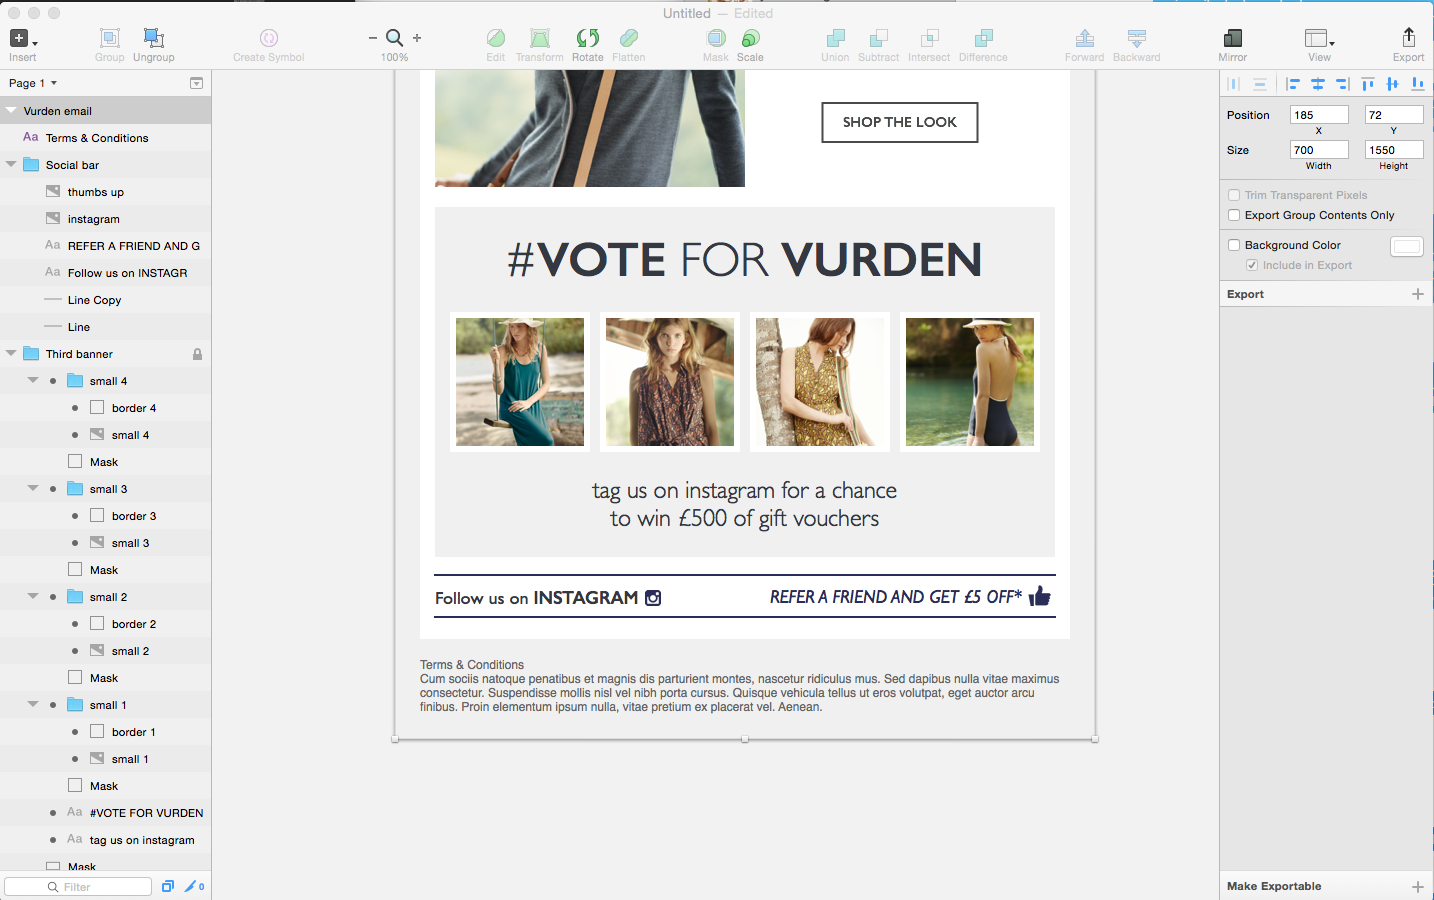
Social bar
To create the social bar the line tool ‘l’ is used again to create two center aligned 2px high lines. Use ‘cmd + shift + p’ your new shortcut to place the two icons. Make sure the text, lines and icons all have a fill of #2A2D57. To accommodate the final footer text the artboard is increased in height by 50 and so is the first layer bg.
Using Sketch to design emails is quick and easy and I would highly recommend other email designers give Sketch a try. See the full email below.
Timing of this post couldn’t be more perfect – downloaded the free trial yesterday. Feels like Sketch would lend itself really well to working within a team with a bunch of pre-made well defined templates. A lot better than Photoshop currently does.
It certainly does work well as part of team. Great idea about the pre-made templates. Let me know how you get on with Sketch 🙂
What’s the experience like for exporting image slices? Easier than photoshop?
Hey Josh, it is just easy. In Sketch it is possible to export straight from the layers palette or turn any layer group into an exportable slice. While you can’t export everything in one go at the end as far as I am aware it’s not to difficult to just export as you go along.
Great article Josh! We’ll add it to the growing collection of articles and tutorials on Sketch App, http://www.sketchappsources.com/.
A big thank you for your blog article.